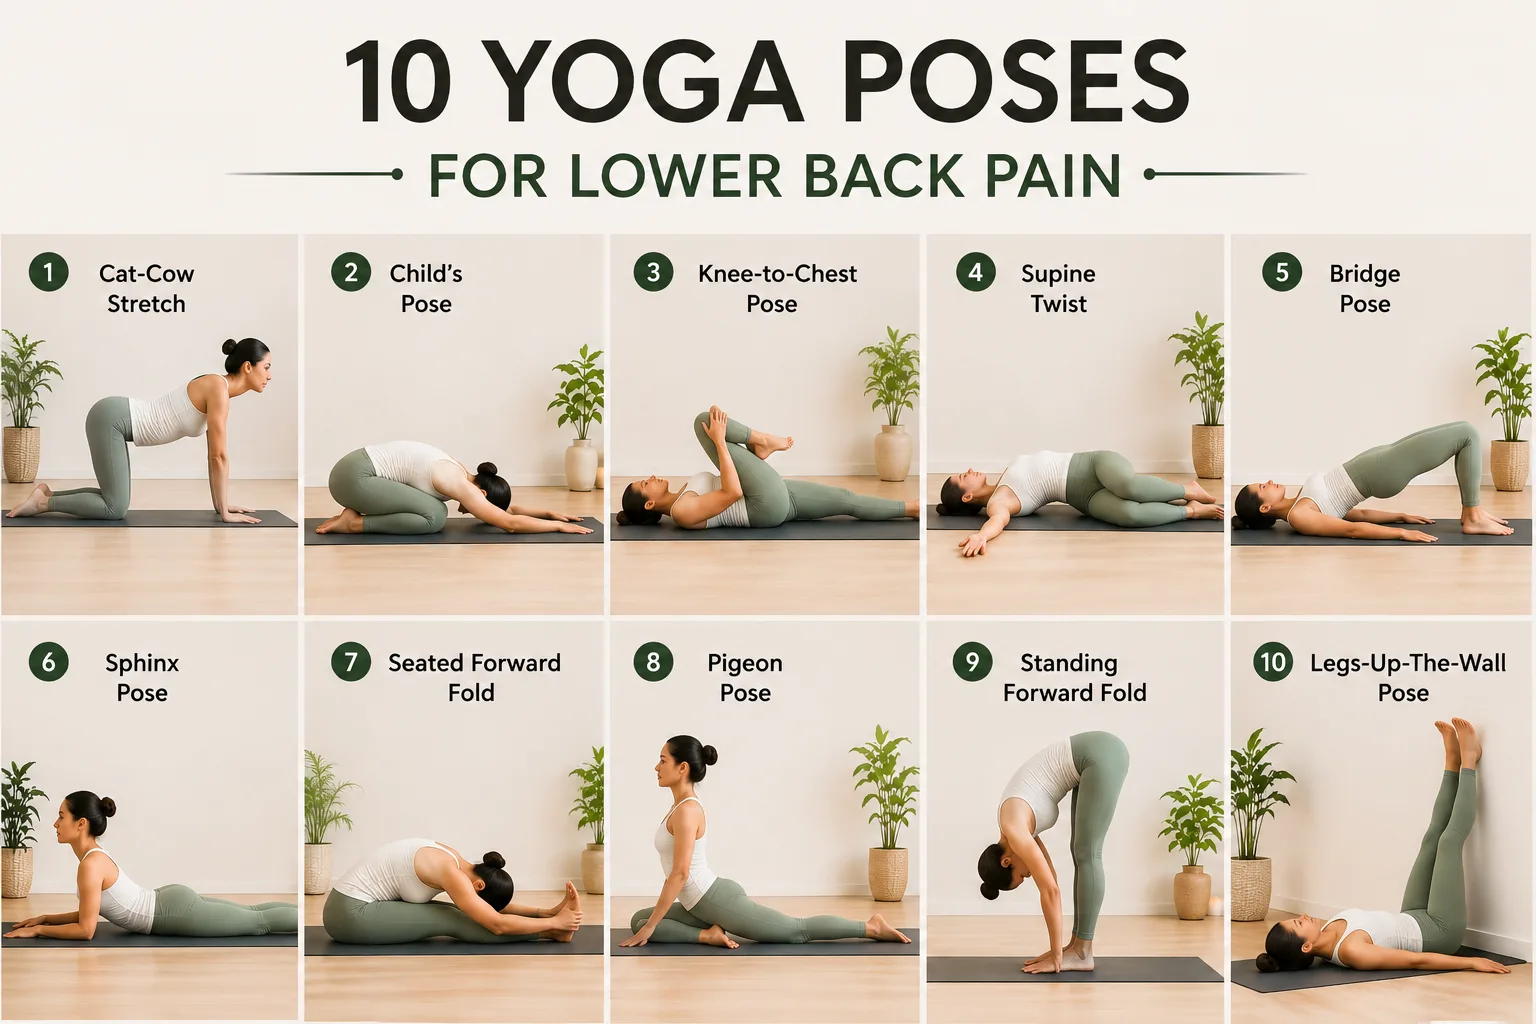
Lower back pain is one of the most common reasons people show up to their very first yoga class – and for good reason. Hours of sitting, weak core muscles, and poor posture all quietly build tension in the lumbar spine, and that tension has to go somewhere. The right yoga poses can genuinely help, not by masking the pain, but by gently mobilizing the spine, stretching the muscles that tend to stay tight, and building the core strength that supports your back day to day.
A quick but important note before we start: yoga isn’t a substitute for a proper diagnosis. If your pain is severe, radiating down a leg, or hasn’t improved after a week or two, that’s a signal to see a doctor or physical therapist before adding new movement into the mix. For everyday stiffness, tension, and the dull ache that comes from too many hours at a desk, though, these ten poses are a genuinely effective place to start.
1. Cat-Cow
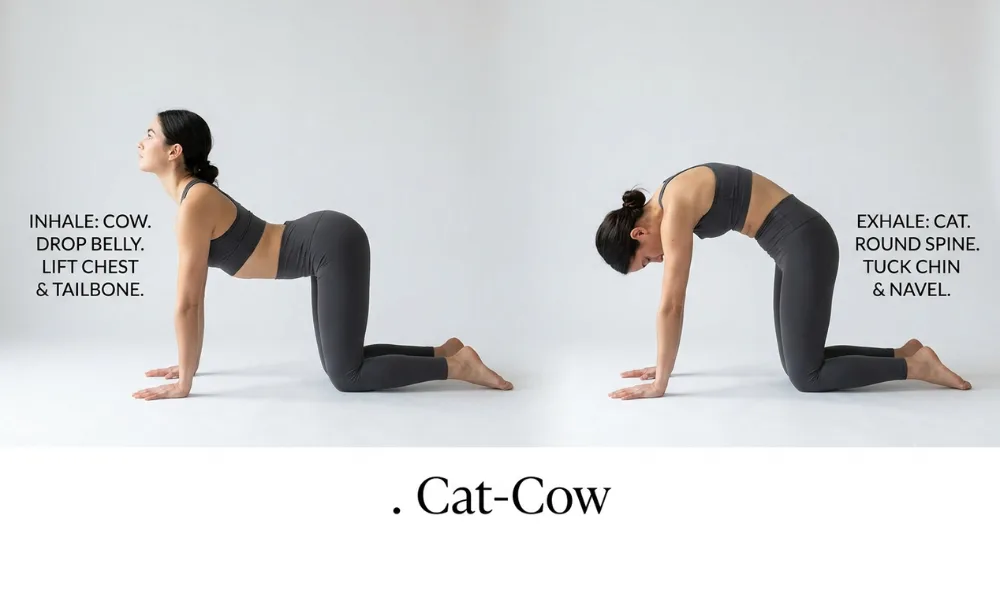
This is the foundational movement almost every back-pain sequence starts with, and for good reason – it mobilizes the entire spine while syncing gentle movement with your breath.
How to do it: Start on all fours, hands under your shoulders, knees under your hips. On an inhale, drop your belly toward the mat, lift your chest and tailbone, and look slightly upward (Cow). On an exhale, round your spine toward the ceiling, tuck your chin, and draw your navel in (Cat). Move slowly between the two for 1-2 minutes.
Why it helps: It increases blood flow to the spinal discs and gently mobilizes each vertebra, which is especially useful after long periods of sitting.
2. Child's Pose
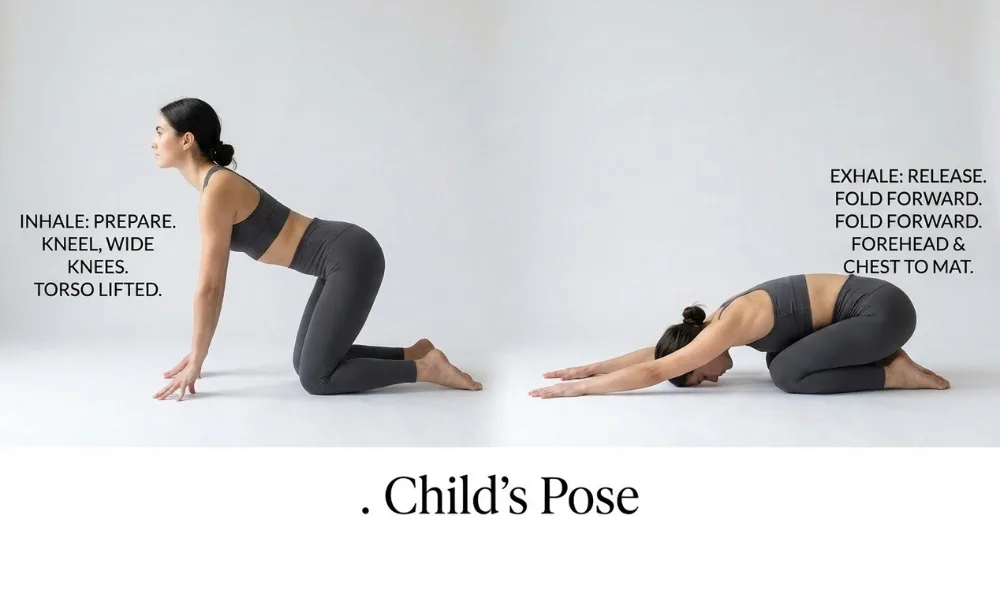
A resting pose that quietly stretches the entire lower back and hips at the same time.
How to do it: Kneel with your big toes touching and knees spread wide. Exhale and walk your hands forward, lowering your chest toward the floor, resting your forehead on the mat or a folded blanket. Stay here for as long as feels comfortable.
Why it helps: It’s one of the few poses that offers real relief with almost zero effort. If your hamstrings are tight, bend your knees further apart – prioritize back relief over depth.
3. Sphinx Pose
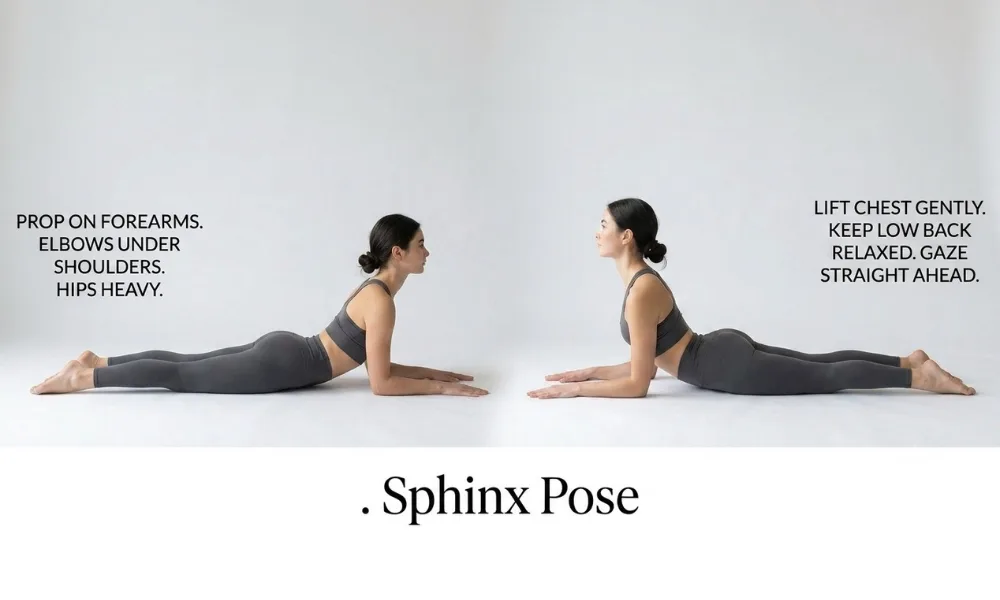
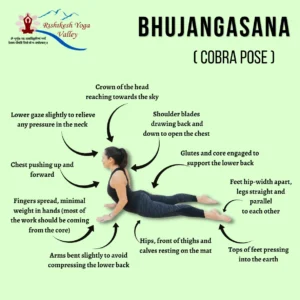
A gentle backbend that strengthens the lower back without the intensity of a deeper pose like Cobra.
How to do it: Lie on your stomach, prop yourself up onto your forearms with elbows under your shoulders, and let your hips stay heavy on the mat. Lift your chest gently, keeping the low back relaxed rather than crunched.
Why it helps: It builds strength in the muscles that support the lumbar spine while keeping the pose accessible for beginners.
4. Bridge Pose
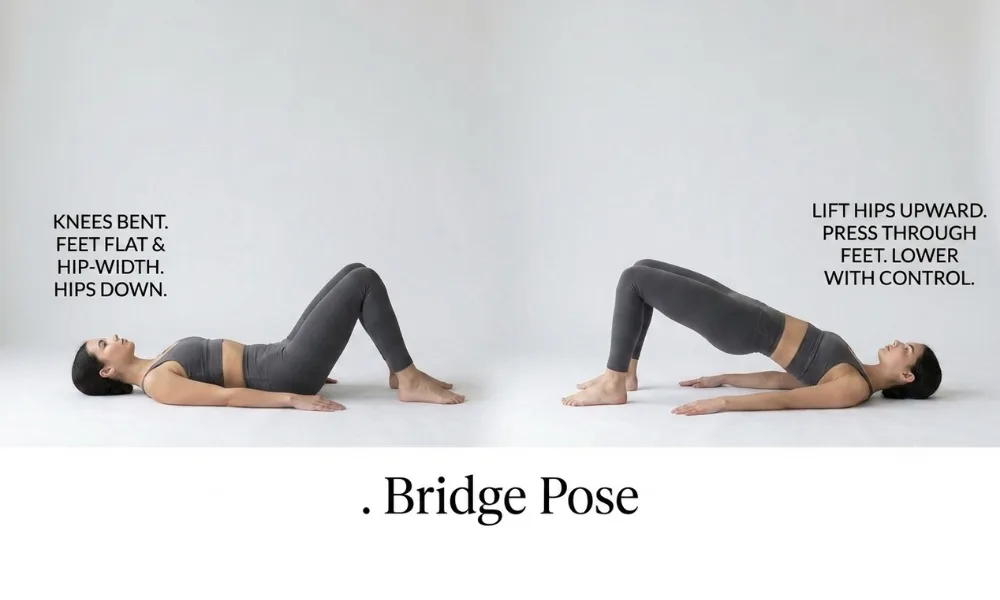
A strengthening pose that works the glutes and lower back together, which helps take pressure off an overworked lumbar spine.
How to do it: Lie on your back with knees bent, feet flat on the floor, hip-width apart. Slowly lift your hips upward, pressing through your feet, and pause if you feel any sharp discomfort. Lower back down with control.
Why it helps: Strengthening the glutes reduces the load your lower back has to carry during everyday movement – a weak posterior chain is a common hidden cause of chronic back tension.
5. Reclined Supine Twist
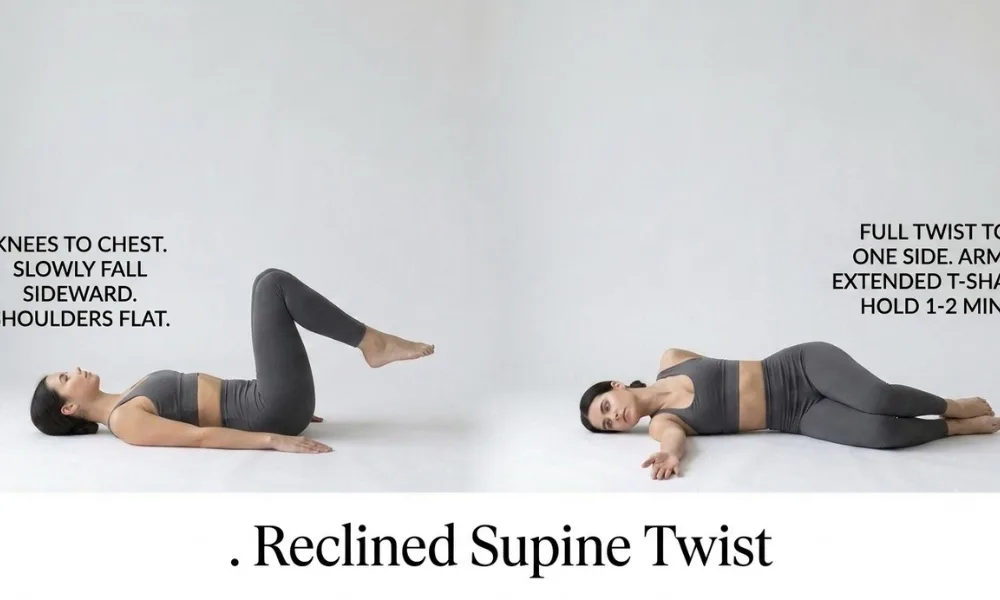
A gentle twist that releases tension along the sides of the spine without any weight-bearing strain.
How to do it: Lying on your back, draw both knees into your chest, then slowly let them fall to one side while keeping your shoulders flat on the mat. Extend your arms into a T-shape and turn your head in the opposite direction. Hold for 1-2 minutes, then repeat on the other side.
Why it helps: It decompresses the lower back and stretches the obliques and glutes, both of which tend to hold tension that radiates into the lumbar spine.
6. Downward-Facing Dog
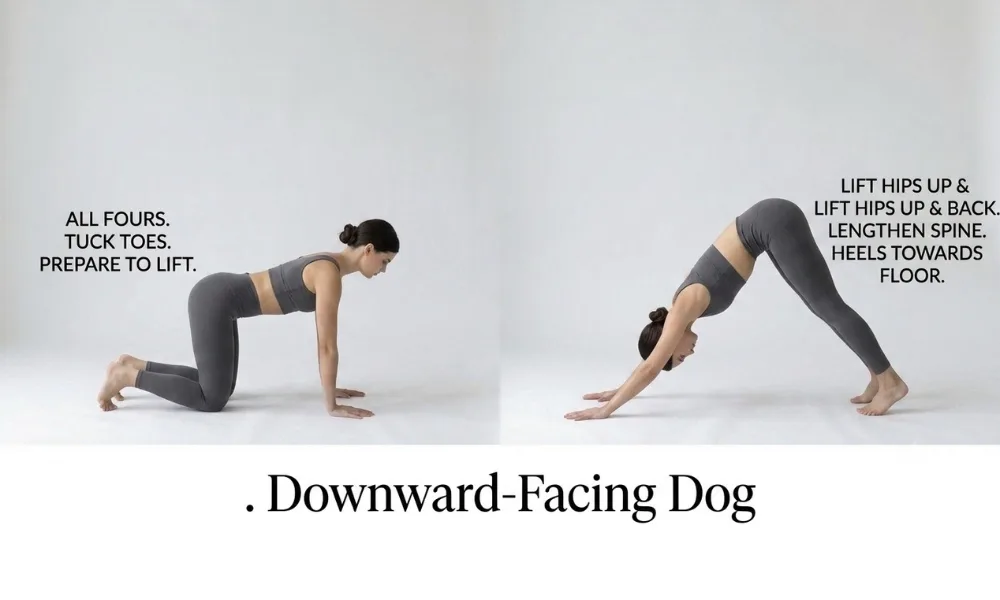
A gentle inversion and full-body stretch that lengthens the entire back line of the body.
How to do it: From all fours, tuck your toes and lift your hips up and back, forming an inverted V-shape. Keep a soft bend in the knees if your hamstrings are tight, and focus on lengthening the spine rather than forcing your heels to the floor.
Why it helps: It decompresses the spine by using gravity to gently traction it, while also stretching the hamstrings and calves that often contribute to lower back tightness when they’re tight.
7. Locust Pose
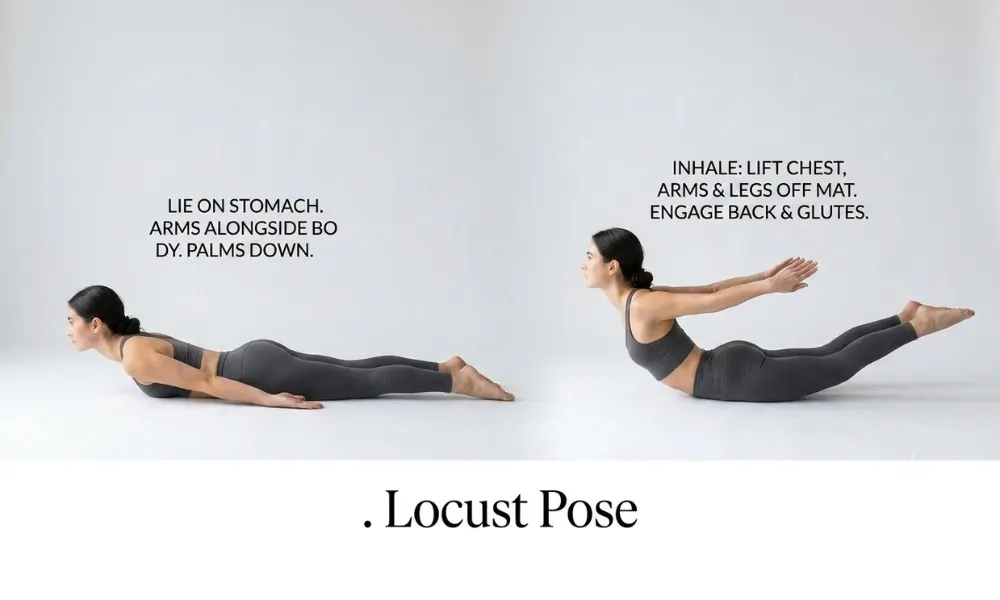
A strengthening backbend that builds the deep muscles running along the spine.
How to do it: Lie on your stomach with arms alongside your body, palms facing down. On an inhale, lift your chest, arms, and legs slightly off the mat, engaging your back and glutes. Hold for a few breaths, then release.
Why it helps: It’s one of the more effective poses for building genuine spinal-extensor strength, which supports the lower back during everyday bending and lifting.
8. Standing Forward Fold
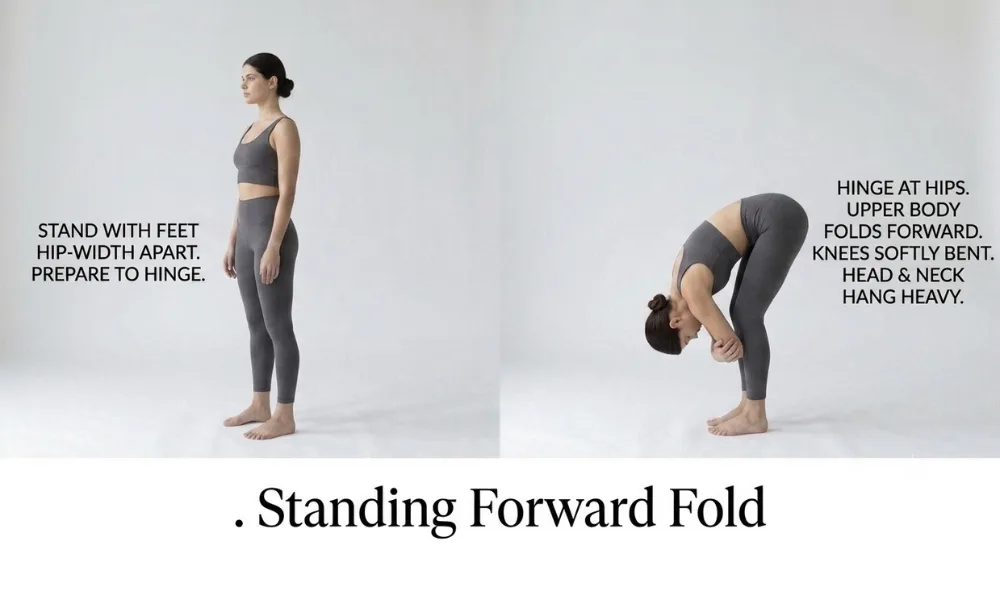
A calming forward bend that releases tension through the hamstrings and lower back simultaneously.
How to do it: Stand with feet hip-width apart, hinge at the hips, and let your upper body fold forward, knees softly bent. Let your head and neck hang heavy, and hold onto opposite elbows if that feels more supported.
Why it helps: Tight hamstrings pull on the pelvis and increase strain on the lower back, so lengthening them here often brings noticeable relief.
9. Seated Figure-4 Stretch
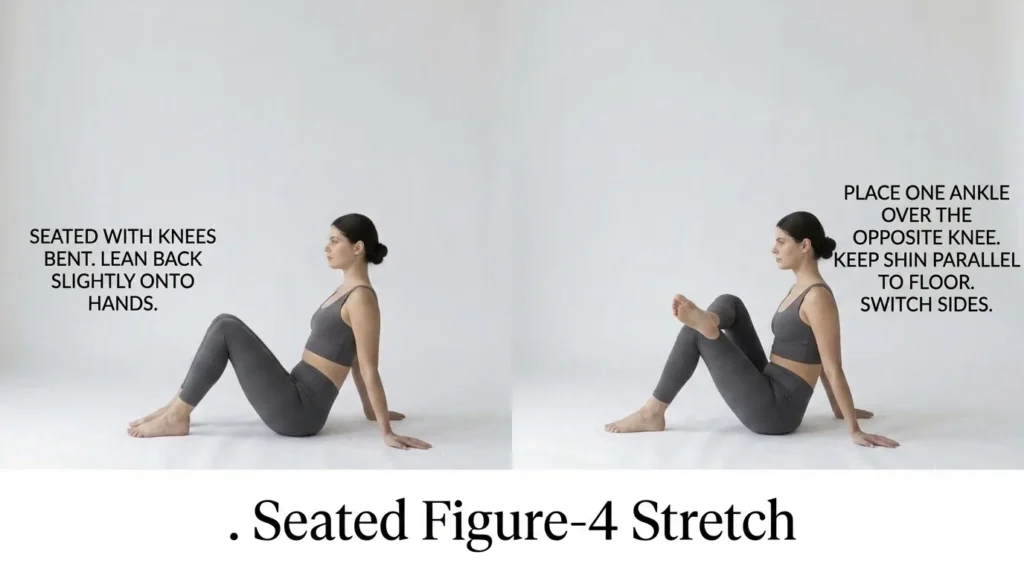
A hip-opening stretch that targets a frequently overlooked contributor to lower back pain: tight glutes and hips.
How to do it: Sit on the floor, lean back slightly onto your hands, and place one ankle over the opposite knee, keeping the shin roughly parallel to the floor. Hold for 20-30 seconds, then switch sides.
Why it helps: Tight hip rotators and glutes often pull on the pelvis in ways that show up as lower back pain – this stretch addresses the actual source rather than just the symptom.
10. Legs-Up-The-Wall Pose
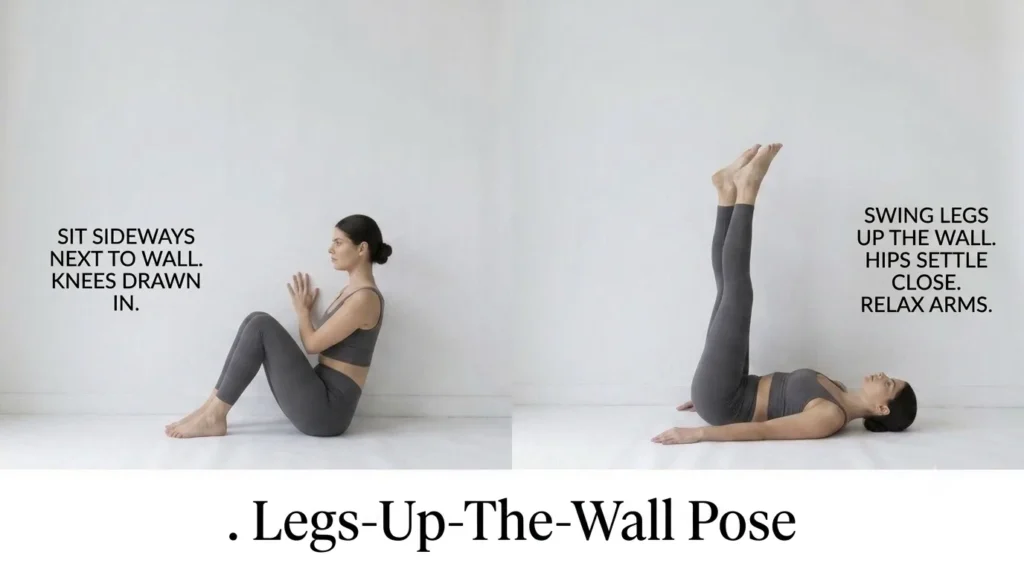
A deeply restorative pose that gently decompresses the lower back and calms the nervous system at the same time.
How to do it: Sit sideways next to a wall with your knees drawn in, then roll onto your back and swing your legs up the wall as you do, letting your hips settle close to it. Relax here for 5-10 minutes, arms resting at your sides.
Why it helps: It takes all weight-bearing pressure off the lower back and pelvis, and the extended stillness helps calm the nervous system, which itself can reduce how much pain your body perceives. Avoid this pose if you have glaucoma or another condition affecting eye pressure, since inversions aren’t recommended in those cases.
A Few Practical Notes on Practicing Safely
- Move slowly, and never push through sharp pain. A gentle stretching sensation is the goal – sharp, shooting, or radiating pain is your body telling you to back off immediately.
- Consistency matters more than intensity. A gentle 15-20 minute practice most days of the week will do more for chronic tension than one intense session followed by nothing for two weeks.
- Avoid deep, forceful twists and backbends during a flare-up. Poses like a deep Wheel Pose or aggressive spinal twists can aggravate an already irritated lower back – save these for once you’re pain-free and building general strength.
- See a professional for anything beyond ordinary stiffness. Persistent, severe, or radiating pain deserves a proper diagnosis before you build a movement routine around it.
Where This Fits Into a Bigger Picture
Understanding why a particular pose helps a particular kind of pain – rather than just running through a generic sequence – is exactly the kind of therapeutic sequencing knowledge that separates a teacher who can genuinely help students from one who’s only ever memorized poses. It’s part of what we cover in the anatomy and sequencing modules of our 200-Hour Yoga Teacher Training in Rishikesh, so graduates leave able to actually adapt a class to the real bodies in front of them.